Takamaki-e Raises Gold Off the Lacquer Until You Can Feel It
· 15 min read
Takamaki-e is the raised form of maki-e, where gold is built up in relief on black lacquer so the design stands proud of the surface and can be felt with a fingertip.
Takamaki-e is the maki-e you can feel. In most gold lacquer work the design lies flat, a picture sprinkled onto a surface. In takamaki-e the gold is raised off the lacquer, built up in relief until a crane wing or a pine branch stands proud of the black ground, and your fingertip can follow the ridge the way your eye follows the line.
The name says what the hand already knows. Taka means high, maki-e means sprinkled picture, and takamaki-e is the high sprinkled picture, gold dust laid over a design that has been lifted off the surface first. It is the most sculptural of the three classic maki-e methods, and once you have touched a good example you will never mistake it for flat work again.
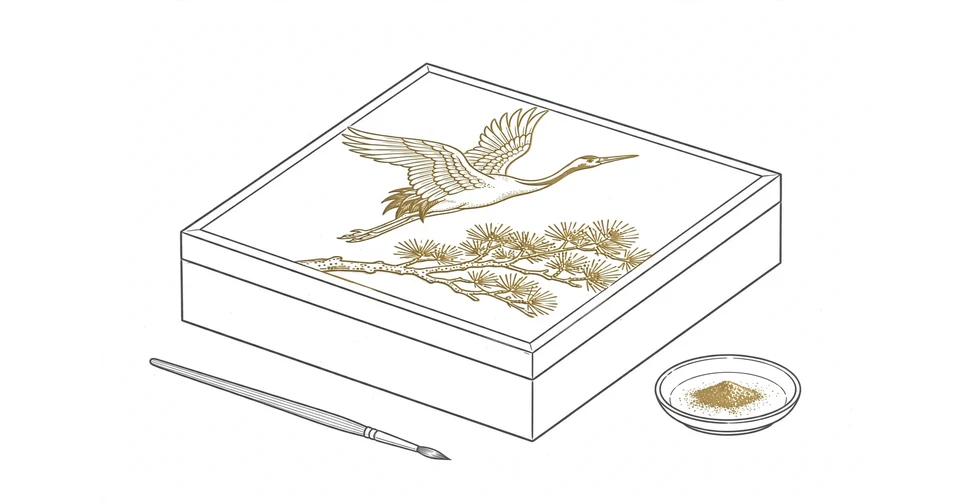
I came to takamaki-e through the inro, the little lacquered box that carried a samurai's day. In the article about that box I wrote that in takamaki-e the design is built up in relief, a single line that hid a whole craft behind it. This article opens that line up, step by step, so you can see how the relief is made, why it took centuries to perfect, and how to look at it when you meet it in a museum case.
What takamaki-e actually is
At its simplest, takamaki-e is maki-e with a foundation. The artist begins with a finished lacquer surface, smooth and black and hard, then draws the design in a special thick lacquer mixed with charcoal or mineral particles. That mixture is the whole trick. Plain lacquer runs thin, but lacquer thickened with fine powder holds its shape, so a line drawn in it stays raised while it dries. Layer by layer, the artist builds the design upward, and only when the relief has reached the height wanted does the ordinary maki-e work begin on top of it. Gold or silver powder is sprinkled onto wet lacquer over the raised shape, sealed under clear coats, and polished, exactly as in flat maki-e. The difference is what lies underneath, a small hill of lacquer that lifts the gold into the light.
The word itself is a compound, and the sources agree on its shape even when they differ on its dates. Maki-e means sprinkled picture, from maki, sprinkling, and e, picture or design. Taka means high. Put together, takamaki-e is the high sprinkled picture, and the height is literal, not poetic. On a fine piece the relief is measured in fractions of a millimetre, yet it changes everything, because light catches a raised edge the way it never catches a flat one, and a fingertip confirms what the eye suspects.
It helps to think of it as the opposite of carving. A carver takes material away to make a picture. A takamaki-e artist adds material to make one, building the picture up from the surface instead of cutting into it. That is why the technique rewards patience more than strength. Each raised layer must dry before the next goes on, and a hurried layer sags or cracks, so the work moves at the speed of drying lacquer, which is to say slowly, in a humid cabinet, over days and weeks.
How a flat picture becomes a small relief
The working sequence of takamaki-e follows the flat method once the relief exists, so the best way to understand it is to walk the whole path. First comes the foundation, the thick base of lacquer built up by coating, drying and polishing, repeated until the ground is deep and flawless. No decoration can rescue a poor ground, because every later layer copies the faults beneath it. Then the artist transfers the design, often by tracing it through thin washi paper, and begins to raise it.
In takamaki-e, raising is done with a brush and a thickened lacquer, and the mix matters as much as the hand. The classic recipe stirs charcoal powder into lacquer until the mixture turns viscous enough to hold a ridge. Tin powder gives a different mix with its own name, and powdered whetstone or clay gives a third, each one raising the pattern a little higher than the last. The artist draws the pattern, lets it dry, and draws again, sometimes many times, until a pine needle has a spine and a crane wing has a curve you can feel. Only then does the gold work start, with lacquer brushed on as glue, gold powder sprinkled from a bamboo tube, a protective coat on top, and then the long polishing that brings the shine out without flattening the hill beneath it.
The drying alone teaches humility. Lacquer does not dry the way paint dries. It hardens in humidity, slowly, and each coat must cure before the next is laid down, or the whole stack of layers can wrinkle. A small box can take weeks. A large one can take months. That slowness is not a flaw in the process. It is the process, and it is why a raised design feels considered in a way a printed one never does. Nothing about it was rushed, because rushing was physically impossible.
Three ways to raise the gold
Not all takamaki-e is raised the same way, and the old names record the recipe, not just the result. The charcoal version is called sumikoage takamaki-e, from sumi, charcoal, and age, raising. It was the first of the raised methods, and it is still the standard against which the others are judged. Charcoal powder is fine, light and easy to mix, and it gives a firm relief that takes gold well.
The tin version is suzuage takamaki-e, raised with tin powder instead of charcoal. It came from the same impulse, to make a lacquer that would stand up rather than flow flat, and it shows how early artists experimented with whatever fine powder was at hand. The third version is sabiage takamaki-e, from sabi, the rust coloured paste of powdered whetstone or clay mixed with lacquer. Sabiage arrived later and it mattered, because it let the artist raise the pattern higher than charcoal alone allowed. A flower petal could stand further off the ground, a wave could curl a little more, and the relief could begin to feel like small sculpture rather than thick paint.
The dates carry a small warning about trusting any single source. The account I follow here, drawn from the Wikipedia survey of maki-e and the Asahi Shimbun material it cites, places the first raised work in the middle of the Kamakura period and sabiage in the Muromachi period that followed. Some popular guides place the flowering of raised work much later, in the middle of the Edo period, and the two cannot both be right about the first appearance. I use the earlier dating because it rests on the fuller published record, but the disagreement is worth knowing. It is a reminder that craft histories are written from surviving objects, and surviving objects are a partial record at best. What no source disputes is the order: flat work first, then raised work, then the mixed method that combined raising with burnishing, which brings us to the family around takamaki-e.
Takamaki-e beside its two sisters
Maki-e is usually described as three techniques, and takamaki-e only makes full sense beside the other two. Hira maki-e is the flat method. The artist brushes a design in lacquer on a finished piece, sprinkles metal powder onto the wet lacquer, seals it and polishes it. It is the simplest of the three, and it was completed in the Kamakura period after the refining of metal powder had improved enough to make fine grains. If you want the full sequence of flat work, from the first sketch to the final polish, the companion piece on this site walks through it in detail. Maki-e sprinkles gold dust onto wet lacquer explains how that flat picture is made, and it is the best starting point before the raised version, because takamaki-e repeats its steps on top of a hill.
Togidashi maki-e is the burnished method, and it is the oldest of the three. The design is sprinkled in the middle of the layering, the whole piece is coated over with black lacquer, and then the surface is polished down until the metal shows through, level with the ground. It was the mainstream method through the Heian period, when gold powder was still coarse, because burying the design protected it. A togidashi surface feels perfectly smooth, and that smoothness is the point. Nothing stands up. Nothing catches a fingernail. The picture is in the lacquer rather than on it.
The fourth method is a marriage of the two. Shishiai togidashi maki-e raises the pattern first, in the takamaki-e manner, and then finishes it by the togidashi method, coating and polishing the whole surface together. The polish never quite levels it, because the raised work underneath refuses to lie flat, so the finished piece keeps a gentle undulation, high where the design rises and smooth where it does not. The sources call it the most complicated of the maki-e methods, developed in the Muromachi period and popular in the Edo period, and it is easy to see why. It asks the artist to master two opposite skills, building up and grinding down, and to know exactly when to stop each one.
Put side by side, the three methods answer three different wishes. Hira maki-e wants a clear picture, cheap enough in effort to make in numbers. Togidashi maki-e wants a picture that will survive handling, sealed inside the surface. Takamaki-e wants a picture you can feel, and it pays for that feeling with time. There is no best among them, only a best for a given object, and the makers who could move between all three were the ones collectors remembered.
Where you meet takamaki-e in the wild
The small box is where most people meet takamaki-e first, and the inro is the classic example. The stacked medicine and seal case hung at a samurai's waist, and its tiny faces carried whole scenes in raised gold. I described that box at length in the piece it grew from, and the link between the two is direct: the inro was the pocket, and takamaki-e was often the decoration that made the pocket worth showing. Inro is the little lacquered box that carried a samurai's day tells the story of the box itself, and the raised cranes and pines on its lid are the reason this technique is worth a piece of its own.
The most famous name attached to raised gold is Shibata Zeshin, who lived from 1807 to 1891 and worked through the end of the Edo period into Meiji. His inro called The Hatter, a three segment box only six and a half centimetres tall, shows a maker of court headgear at work in raised gold, with his wife speaking to him on the other side. It is a whole workshop scene on a surface smaller than a matchbox, and it is the kind of piece that makes the technique's appeal obvious. Zeshin also painted Fuji at Tagonoura in maki-e in 1872, a work now famous enough to illustrate almost every survey of the craft.
Museums are the other place to meet it. The Metropolitan Museum of Art in New York holds an eighteenth century inro decorated with the characters for longevity and good fortune and the seven lucky treasures on a checkerboard ground, and the Tokyo National Museum holds national treasure writing boxes where raised work sits beside mother of pearl inlay. The point of naming these pieces is not to build a checklist. It is to say that takamaki-e survived because it was collected, and it was collected because it could be held in the hand and felt, not only looked at from a distance.
What the gold is made of
Gold gets the attention, but takamaki-e uses a whole shelf of metal powders, and the choice changes the picture. The surveys list gold, silver, copper, brass, lead, aluminium, platinum and pewter, with alloys mixed for colour. A mix of gold and silver called aokin gives a lighter gold, and a blend of gold and copper called shakudo gives a reddish bronze that can darken toward a blackish purple patina over time. The Japan Tourism Agency guide to maki-e describes these mixtures plainly, and it is the clearest official summary I found of how colour is tuned before a single grain is sprinkled.
Grain size matters as much as metal. Fine powder, called keshifun, is easy to work with but its colour turns whitish and dull, with little gloss. Large round grains, called marufun, are hard to handle but durable, with a strong lustre from the irregular reflection of the particles. Between them sits hiragime, flat grains that split the difference. A maker chooses the grain the way a painter chooses a brush, coarse for bold shine, fine for soft mist, and the raised ground underneath makes the choice visible, because a big grain on a high ridge catches light twice, once from the gold and once from the height.
The tools are as specialised as the powders. A bamboo tube called a funzutsu, with silk or gauze over one end, sprinkles powder evenly, and a small thumb mounted palette called a tsumeban holds liquid lacquer within reach. Delicate brushes sweep away excess powder without disturbing the design. None of this is fast, and none of it can be hurried by buying better tools. The tools only carry the skill. The skill is the years, and the sources are blunt about that: young artists train for many years before they are trusted with fine work, and the first lacquer master linked to specific works, Koami Docho, who lived from 1410 to 1478, set a standard that the two great schools of the craft, his own and that of Igarashi Shinsai, carried forward for centuries.
How to look at a raised design
If you ever stand in front of a case of takamaki-e, start with your eyes closed. Not literally, but almost. Look first at where the light breaks, because a raised design announces itself in highlights. A flat gold picture shines evenly. A raised one has a bright edge on one side and a soft shadow on the other, and the shadow moves as you move. That moving shadow is the signature of the technique, and it is the fastest way to tell raised work from flat work without touching the glass.
Then look at the edges of the raised shapes. On good work the edges are clean and the gold lies evenly over the hill, with no bare patches where the powder failed to stick and no drips where the lacquer ran. On weaker work the gold thins at the crest, where the brush could not hold the powder, or pools in the valleys. I find this a forgiving way to judge craft in general, not only lacquer. The hard part of any technique shows at the transition, where one thing becomes another, and a maker who controls the transition controls the work.
Finally, look at what the maker chose to raise. A pine branch raised and a sky left flat is a decision, not an accident. The raised part is where the maker wanted your eye, and then your hand, to go. On an inro that is usually the crane, or the flower, or the face. The background stays low so the subject can stand. It is a small lesson in emphasis, and it travels well outside lacquer. Raise one thing, leave the rest quiet, and the eye knows where to land. Raise everything, and nothing stands up at all.
A picture you can feel
Takamaki-e survives because it answers a wish that flat pictures cannot. We look at most art with our eyes only, and we are used to that distance. A raised lacquer design closes the distance by a fraction of a millimetre, and that fraction is enough to change the relationship. The picture is no longer only something to see. It is something to feel, and feeling it makes it yours in a way that seeing never quite does. That is why the technique outlived the sash and the seal case and the world that invented it. The boxes stopped being carried, but the gold stayed raised, and people kept wanting to run a finger over it, just to be sure it was really there.
More in Culture & Society
- Wajima-nuri Is the Lacquer That Survives Being Dropped
- Tsugaru-nuri Hides Four Seasons of Colour Under the Lacquer
- Shunkei-nuri Lets the Wood Grain Shine Through the Lacquer
- Shibayama Turns Shell Ivory and Coral Into Small Paintings in Lacquer
- Togidashi Buries Gold in Lacquer and Polishes It Back Into the Light
- Nashiji Scatters Gold Dust Like Pear Skin Across Black Lacquer
Latest posts
- Raden Turns Mother of Pearl Into Lacquer That Catches the Light
- Maki-e Sprinkles Gold Dust Onto Wet Lacquer
- Urushi Is the Tree Sap Japan Turns Into Lacquer That Outlives Centuries
- Ojime Is the Tiny Bead That Keeps a Netsuke From Slipping Away
- Inro Is the Little Lacquered Box That Carried a Samurai's Day
- Hachimaki Is the Headband Japan Ties On Before the Hard Part Begins
- Netsuke Held a Samurai's World on a Cord
- Tenugui Is the Thin Cotton Cloth Japan Uses for Everything
- Kinchaku Carries a Whole Festival in One Small Bag
- Takuan Turns a Humble Daikon Into Japan's Yellow Crunch
- Nukazuke Is the Living Pickle Bed Japan Feeds Every Day
- Tsukemono Is the Crunch Japan Puts Beside Every Meal
- Ochazuke Is Rice Tea and Comfort in One Bowl
- Aojiso Is the Green Leaf Japan Eats Fresh and Raw
- Akajiso Gives Umeboshi Its Deep Red Blush